3. Firewall Setup with pfSense in a VirtualBox Lab
This page is part of a broader series on creating a cybersecurity lab with VirtualBox.
Click here to return to the main project description page.
In this module, we’ll access the pfSense web interface and set up firewall rules for our VirtualBox lab using the Kali virtual machine.
Setup pfSense's general settings
Since the SSL certificate is self signed, it will show the warning page
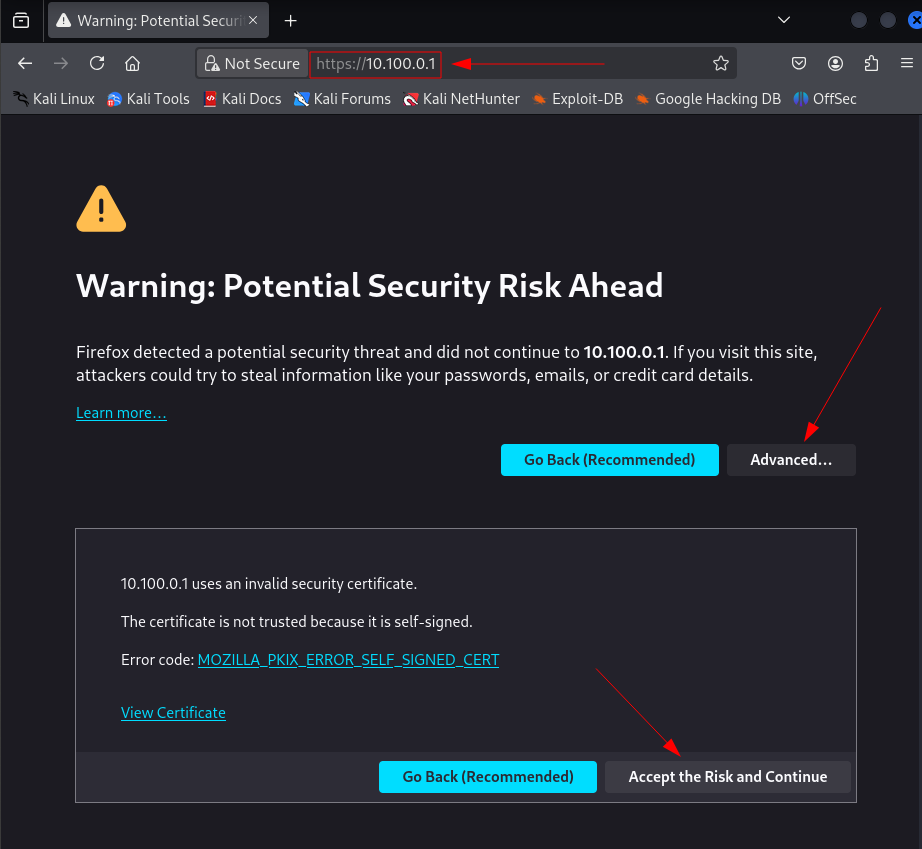
In our kali, using a web browser, go to https://10.100.0.1/
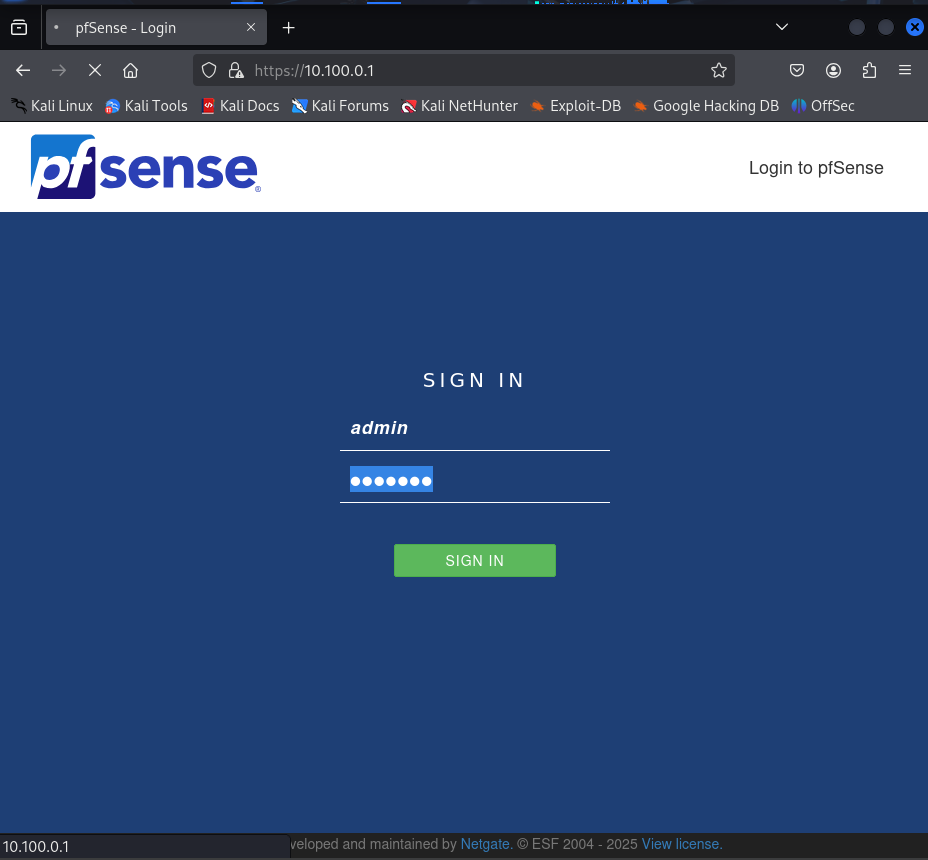
Login screen with default credentials
The default credentials are:
- Username:
admin - Password:
pfsense
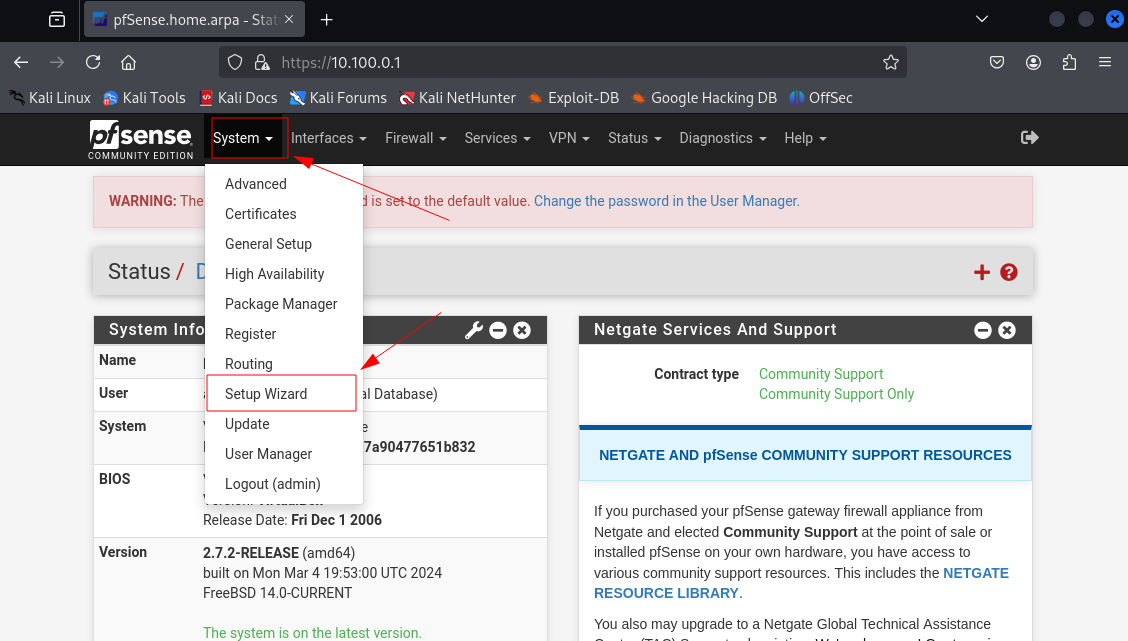
Go to System -> Setup Wizard to setup the firewall
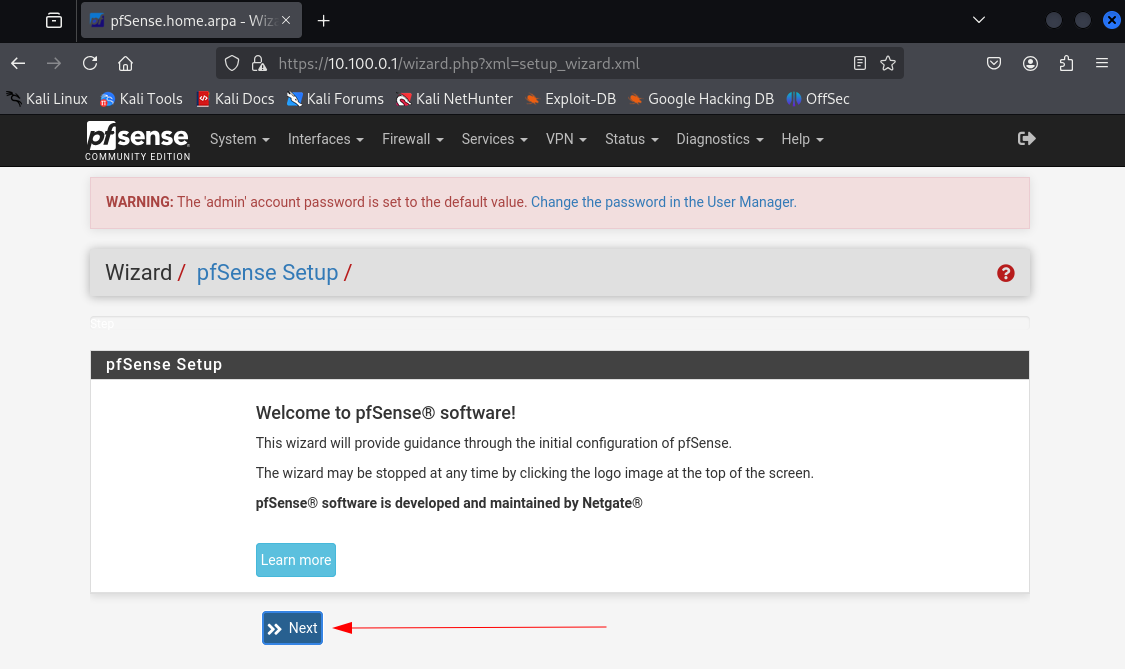
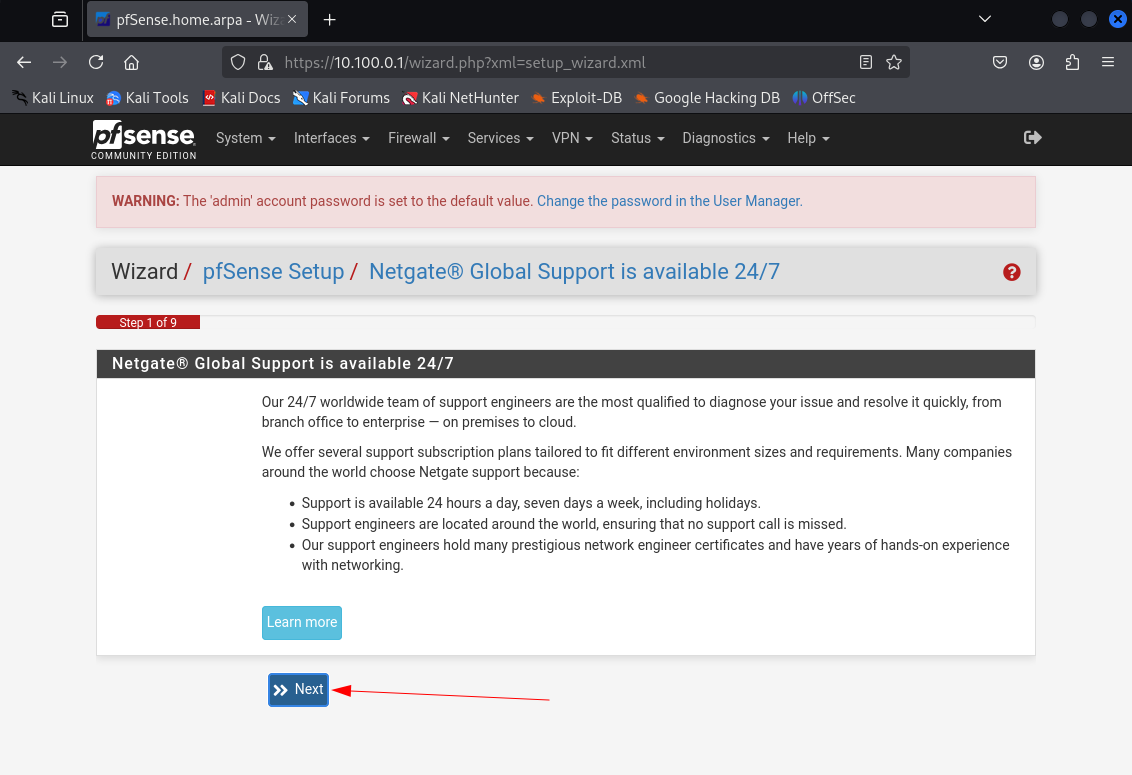
Hit Next
Hit Next

Set the Hostname and Domain, uncheck the Override DNS case
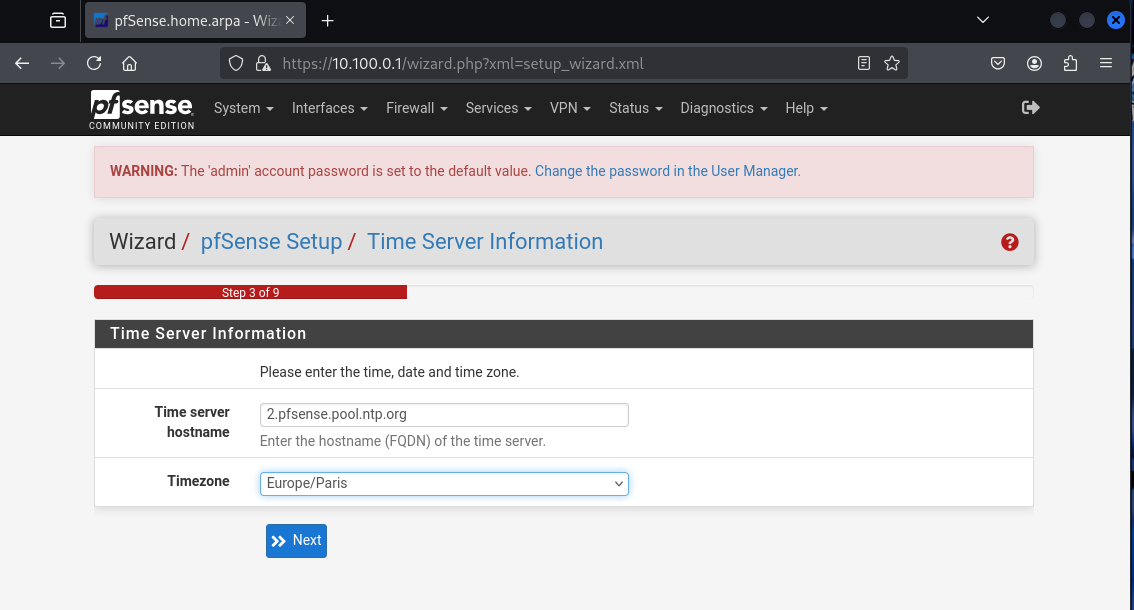
set the right timezone for your region and click Next
Since this pfSense VM is running in a homelab, its WAN interface is not directly connected to the public internet — it's getting a private IP address from your home router via the bridged adapter.
This setup is called double NAT:
- Your home router is doing NAT for your local network.
- pfSense is doing NAT again for your lab network behind it.
Because the pfSense WAN interface is on a private IP range (e.g., 192.168.x.x), we need to allow traffic from private IP addresses to enter through the WAN. So it's important to uncheck this box, or pfSense will block that legitimate traffic from your home network.
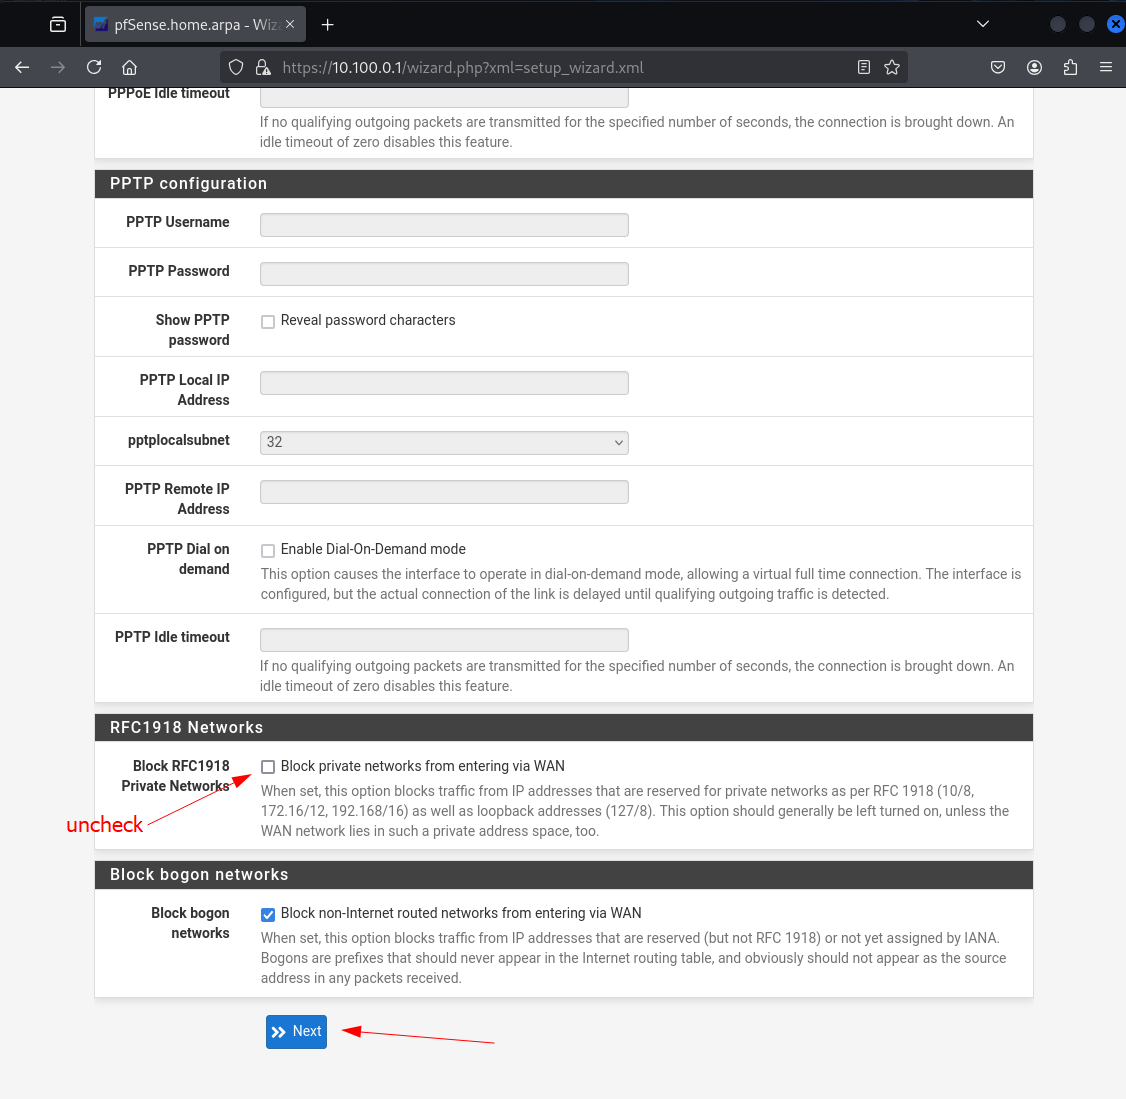
Scroll down and uncheck Block private networks from entering via WAN. then hit Next
What is double NAT and why uncheck this?
Double NAT occurs when two devices (like your home router and pfSense) both perform Network Address Translation. In a homelab, pfSense's WAN interface typically gets a private IP from your home router, which is itself behind a NAT.
By default, pfSense blocks traffic from private IP ranges on its WAN, assuming it's directly exposed to the internet. But in this setup, your home router (192.168.x.x) is the source of legitimate traffic. Unchecking this allows your home network to reach the pfSense WAN without being incorrectly blocked.
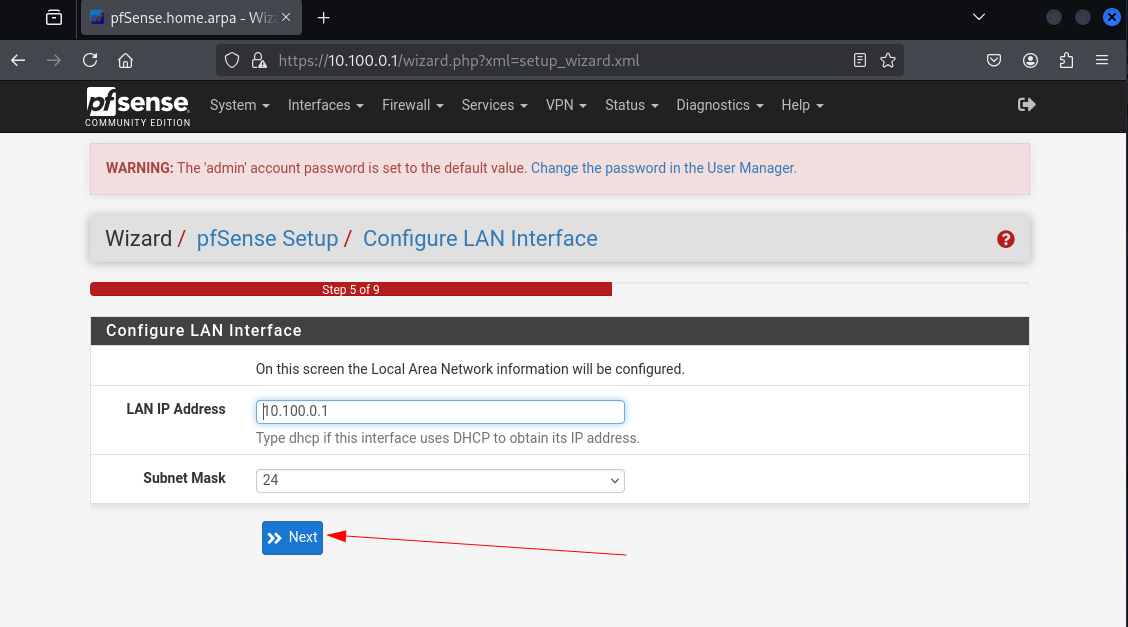
The LAN's ip is already configured, leave as is and hit Next
Update the administrator password to a more robust one.
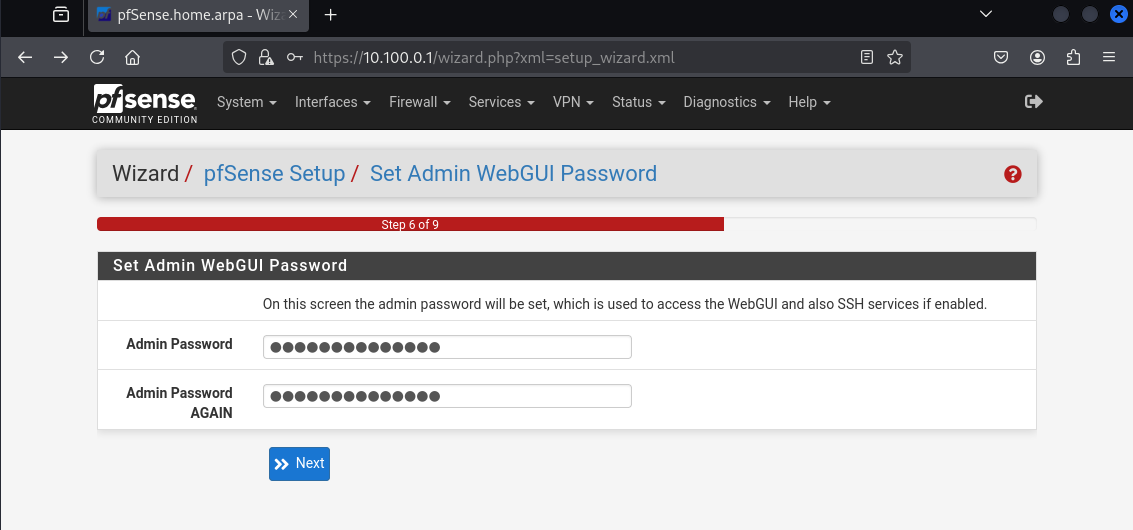
Once done, proceed by clicking Next
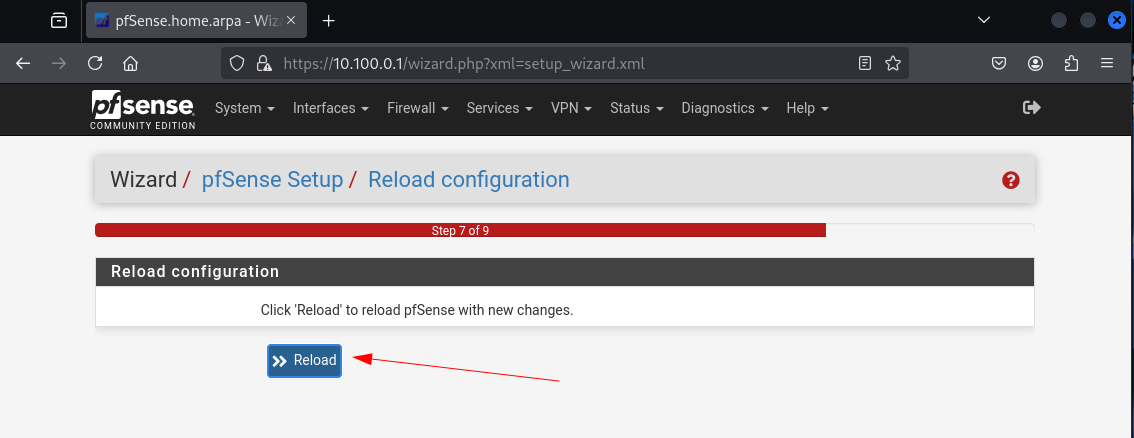
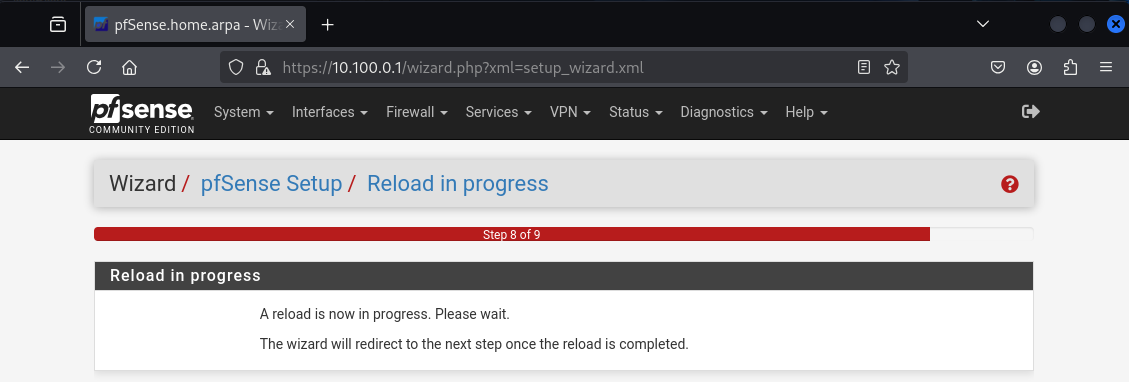
Click Reload
Click Finish
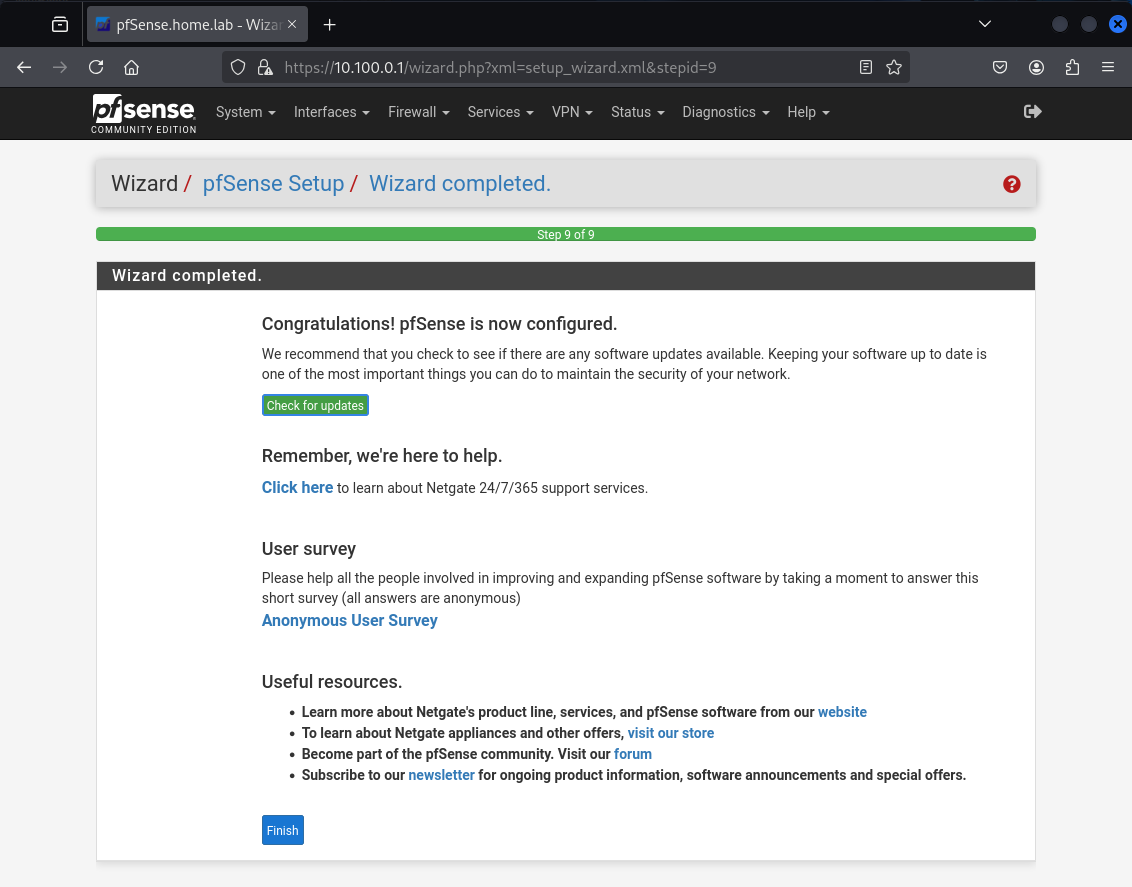
Click Finish
Configure the network interfaces
OPT1 : the DMZ interface
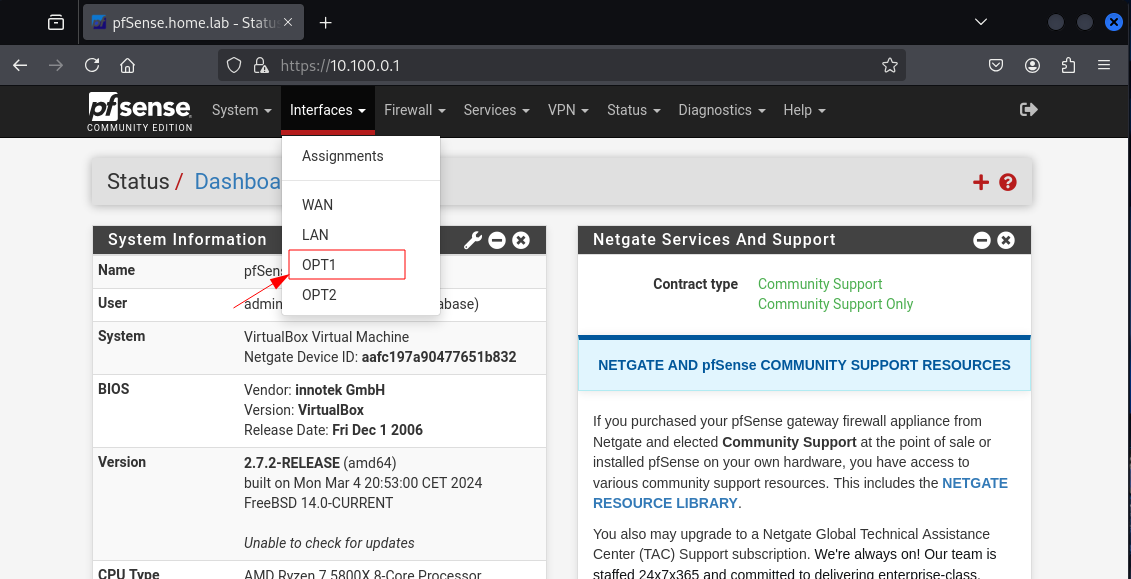
Choose OPT1
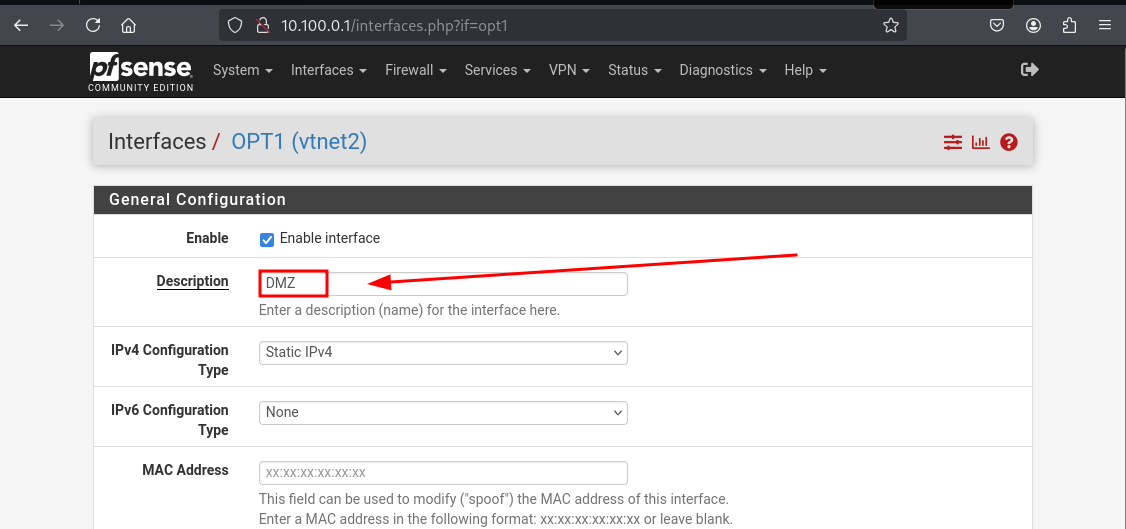
We will name it DMZ according to our architecture's diagram

Scroll down and hit SAVE
OPT2 : the AD interface
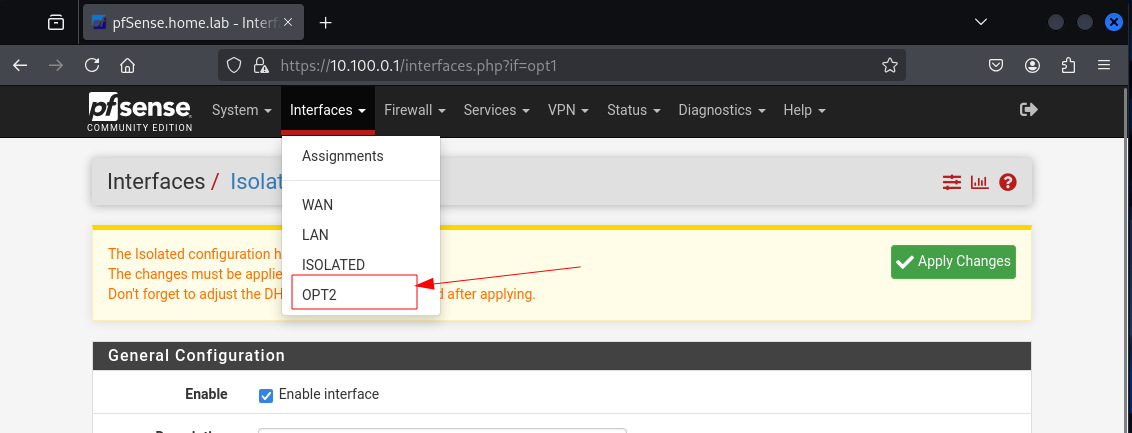
Next, we choose OPT2
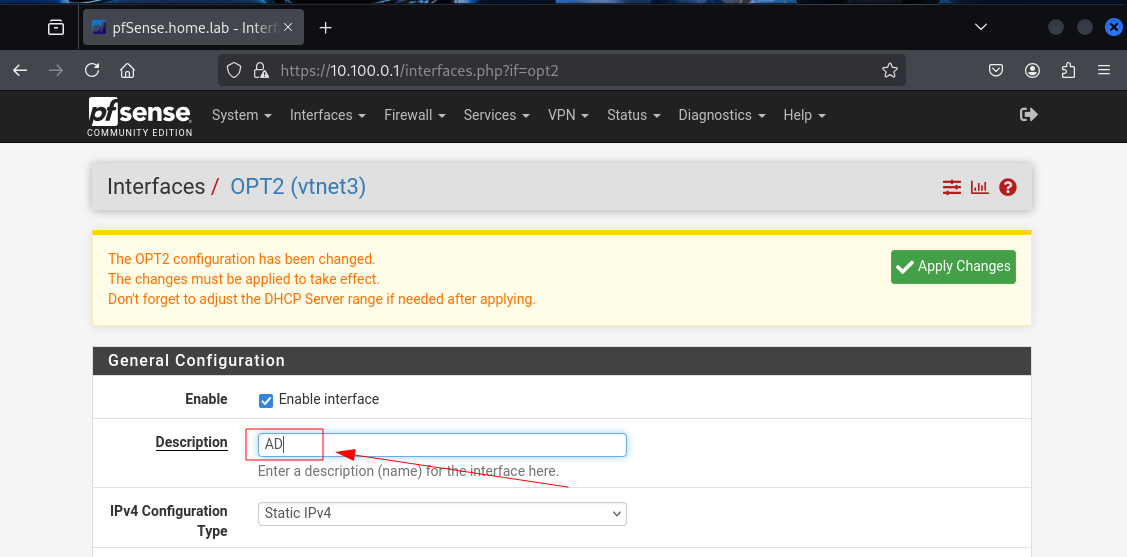
We will name it AD, this is where we will install GOAD
Scroll down and hit SAVE
Optional : Tune the DNS Resolver service for optimal performance.
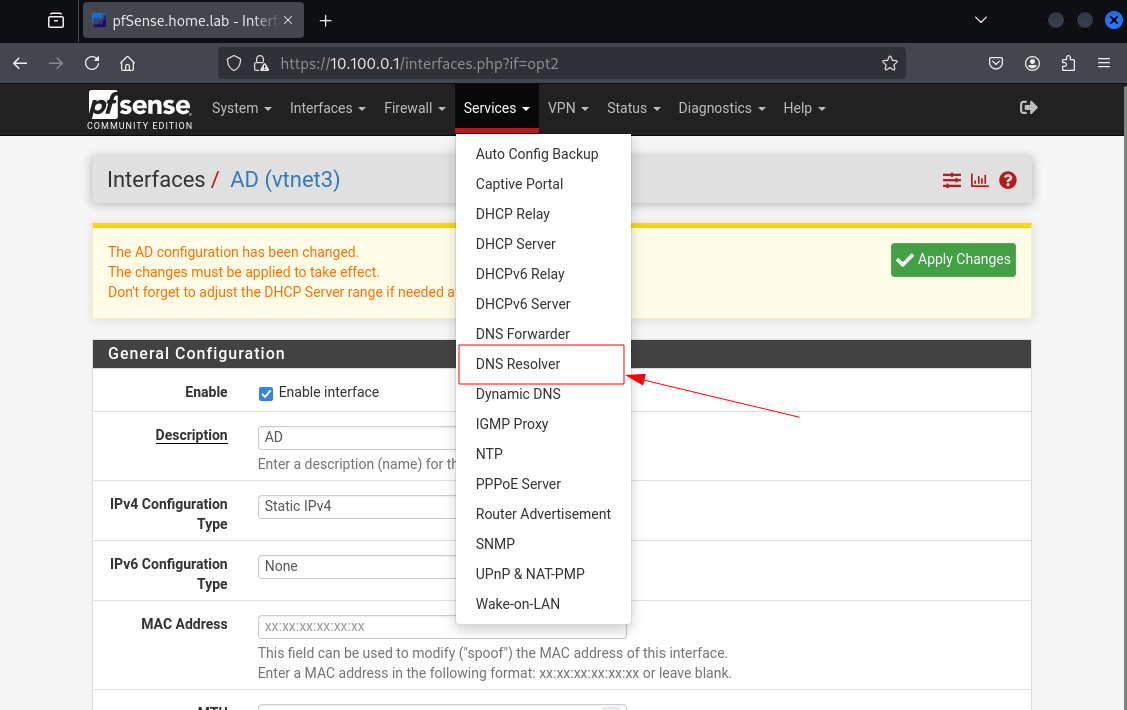
Go to Services then click on DNS Resolver
As of the time of writing (02/07/2025), Netgate is encouraging users to adopt the Kea DHCP daemon, as the ISC DHCP daemon is being phased out. If you choose to use Kea, certain configuration options will no longer be available.
To access those options, you’ll need to temporarily switch back to ISC DHCP, make the necessary changes, and then return to Kea.
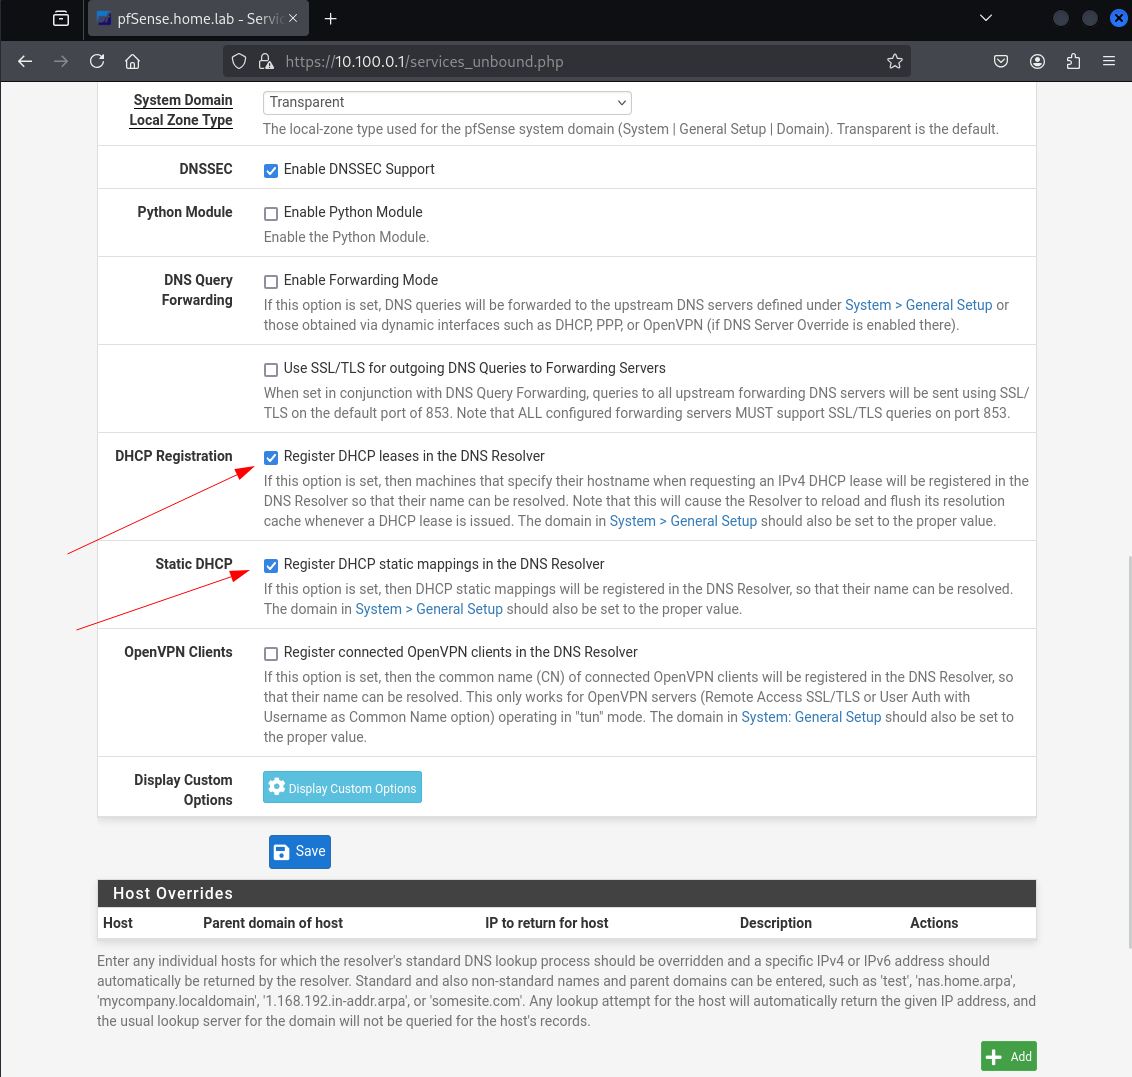
Check both Register DHCP leases in the DNS Resolver and Register DHCP static mappings in the DNS Resolver and then click Save
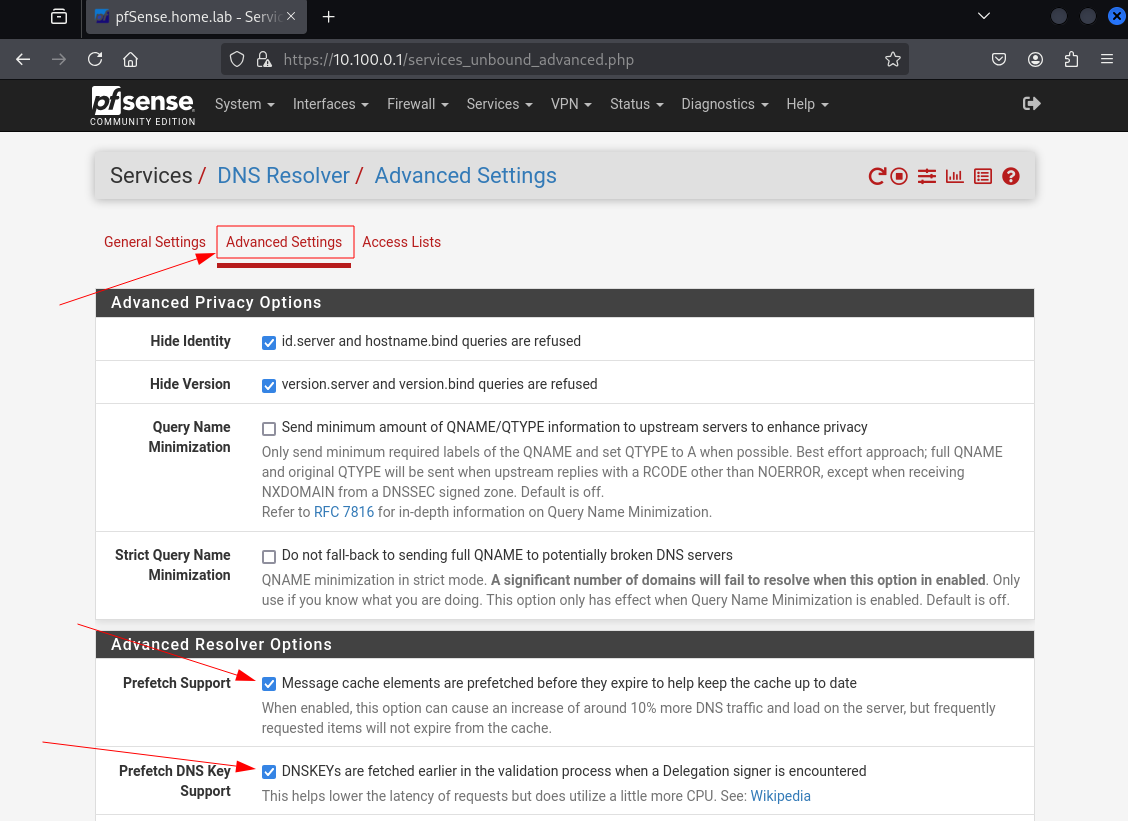
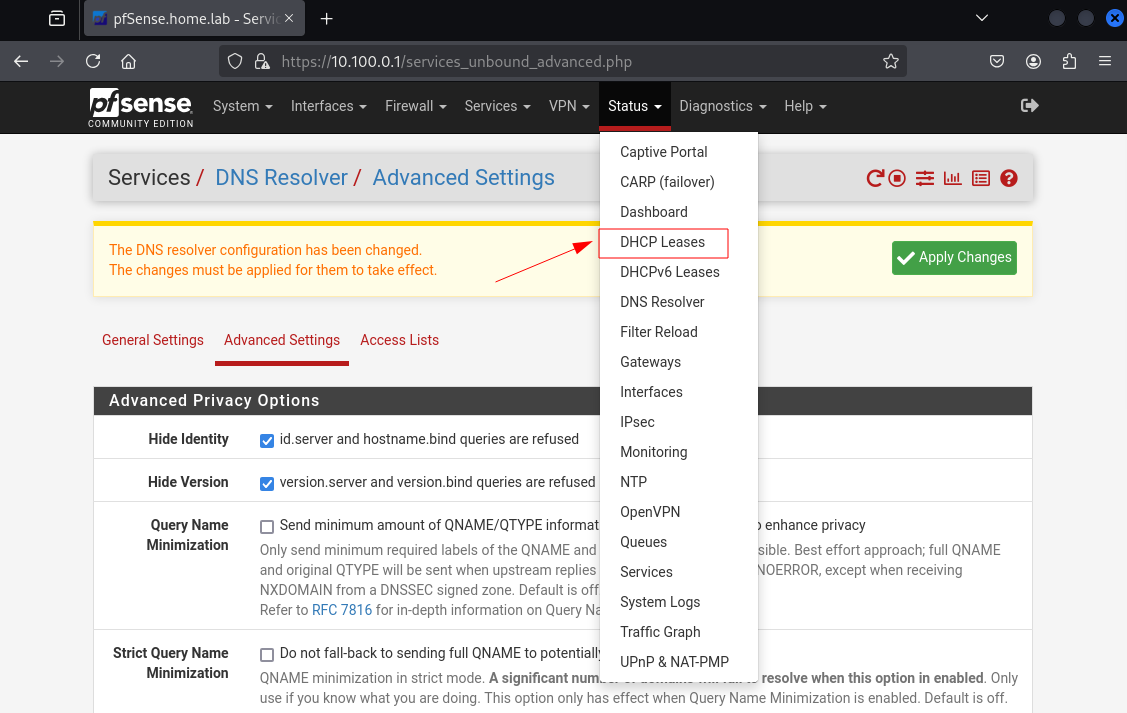
Navigate to DNS Resolver > Advanced Settings, check Prefetch Support and Prefetch DNS Key Support the required checkboxes, then click Save and Apply Changes.

Hit Save
Assign a static DHCP lease to our attack/management Kali machine.
Let's Configure pfSense to assign a fixed IP address to the Kali machine based on its MAC address, ensuring consistent network access for attack and management tasks. This guarantees stable connectivity for remote access, firewall rules, and SIEM log correlation.
Navigate to Status > DHCP Leases.
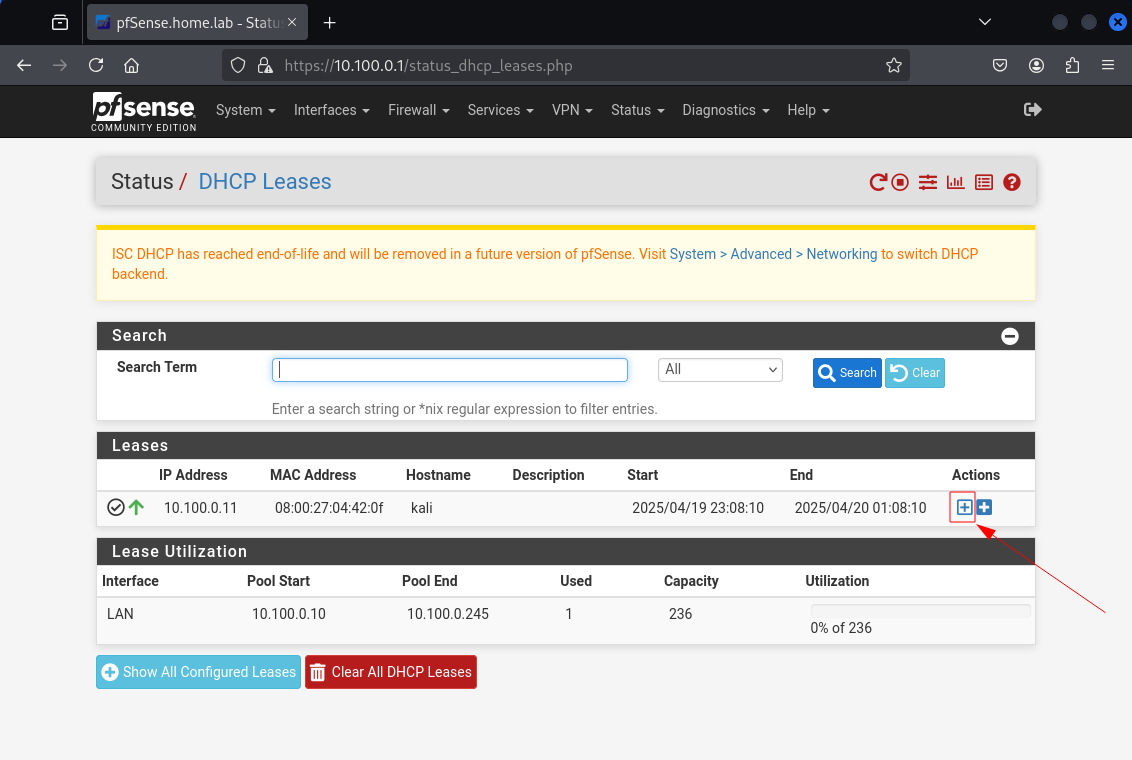
Click on the hollow + sign that indicates Add static mapping
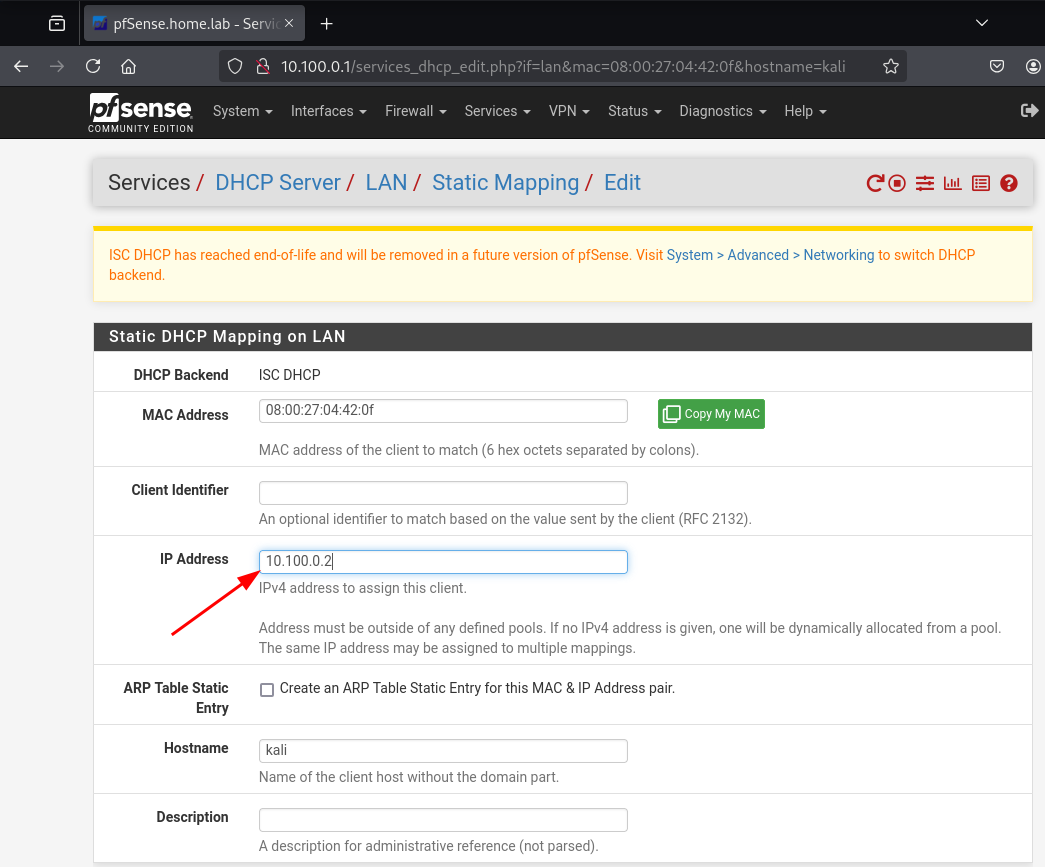
Set the IP to 10.100.0.2

Hit Save

Click Apply Changes to apply
Configure the Firewall Rules
Define aliases
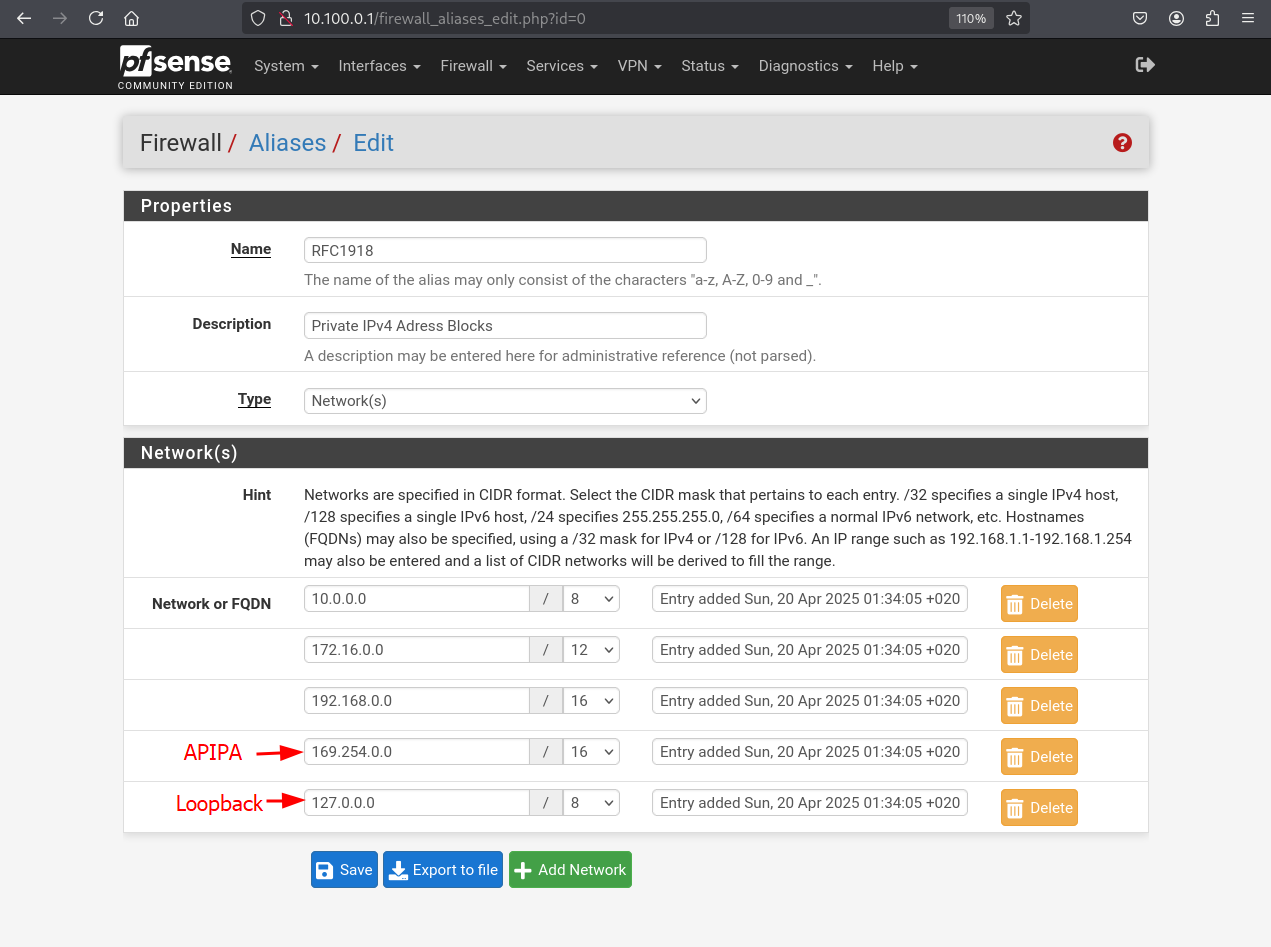
Define an alias for the RFC1918 address ranges.
What is RFC1918?
RFC1918 is a technical document published by the Internet Engineering Task Force (IETF) that defines private IP address ranges for use within private networks.
Full Title:
"Address Allocation for Private Internets" Published: February 1996
Purpose:
RFC1918 specifies IP address ranges that are not routable on the public internet. These are intended for use in internal networks (home, office, corporate) and help preserve the limited IPv4 address space.
The Three Private IP Ranges Defined by RFC1918:
| Class | IP Range | CIDR Notation | Number of Addresses |
|---|---|---|---|
| A | 10.0.0.0 – 10.255.255.255 | 10.0.0.0/8 | 16,777,216 |
| B | 172.16.0.0 – 172.31.255.255 | 172.16.0.0/12 | 1,048,576 |
| C | 192.168.0.0 – 192.168.255.255 | 192.168.0.0/16 | 65,536 |
Key Characteristics:
- Non-routable on the internet: Routers on the internet will drop packets from these ranges.
- Commonly used with NAT (Network Address Translation): A single public IP address can represent many private IP addresses inside a local network.
- Used in homes, businesses, and enterprise environments.
Example Use Cases:
- Home Wi-Fi routers assigning IPs like
192.168.1.1. - Corporate networks using
10.0.0.0/8internally. - Virtual labs and test environments.
The alias will serve as a reference to all private IPv4 spaces in future firewall rules, making configurations cleaner and easier to manage when defining block/allow rules.
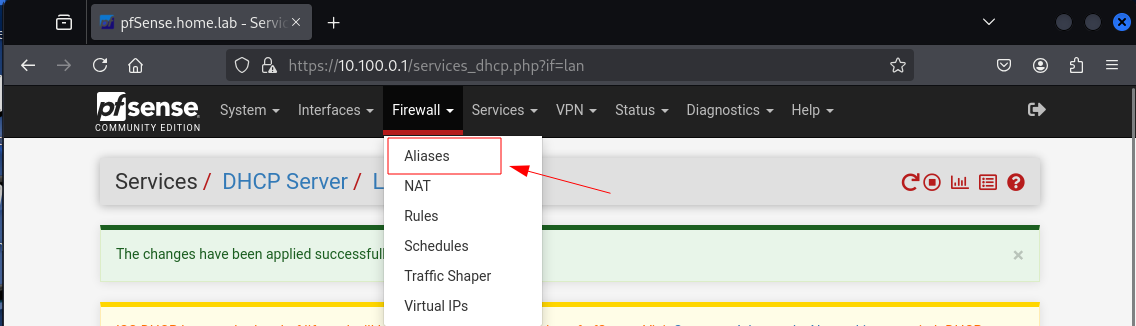
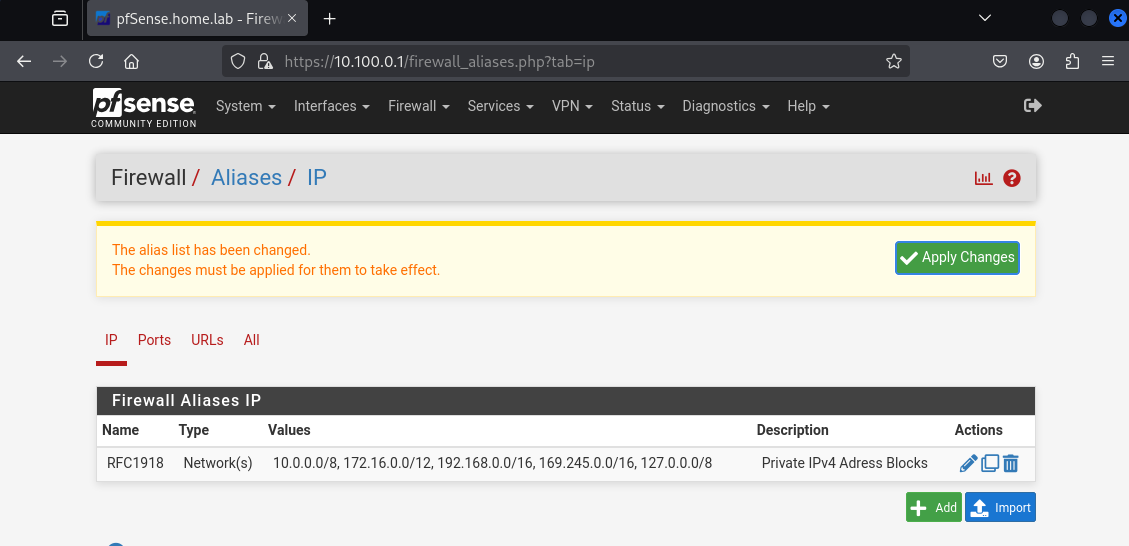
Navigate to Firewall > Aliases
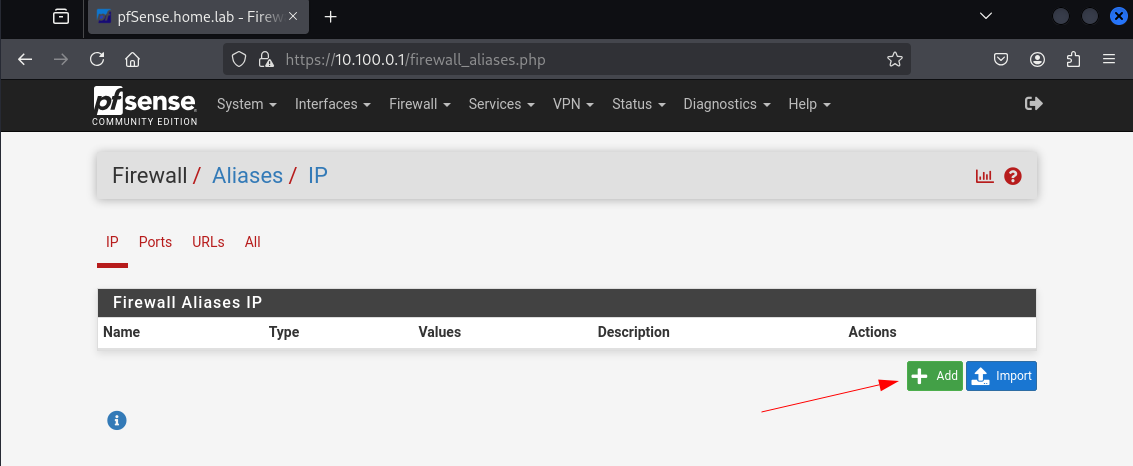
Click Add
Input the fields and hit Save
What are APIPA and loopback addresses?
- APIPA (Automatic Private IP Addressing) uses the 169.254.0.0/16 range. It's assigned automatically when DHCP fails, allowing basic local connectivity.
- Loopback addresses (127.0.0.0/8) refer to the local host itself and are used for internal testing and inter-process communication.
Blocking or allowing traffic to/from these ranges can be important for segmentation and security policy enforcement.
Create an Alias for our Kali attack/management machine
The alias will serve as a reference to our Kali attack/management host in future firewall rules, making configurations cleaner and easier to manage when defining block/allow rules.
Click Add
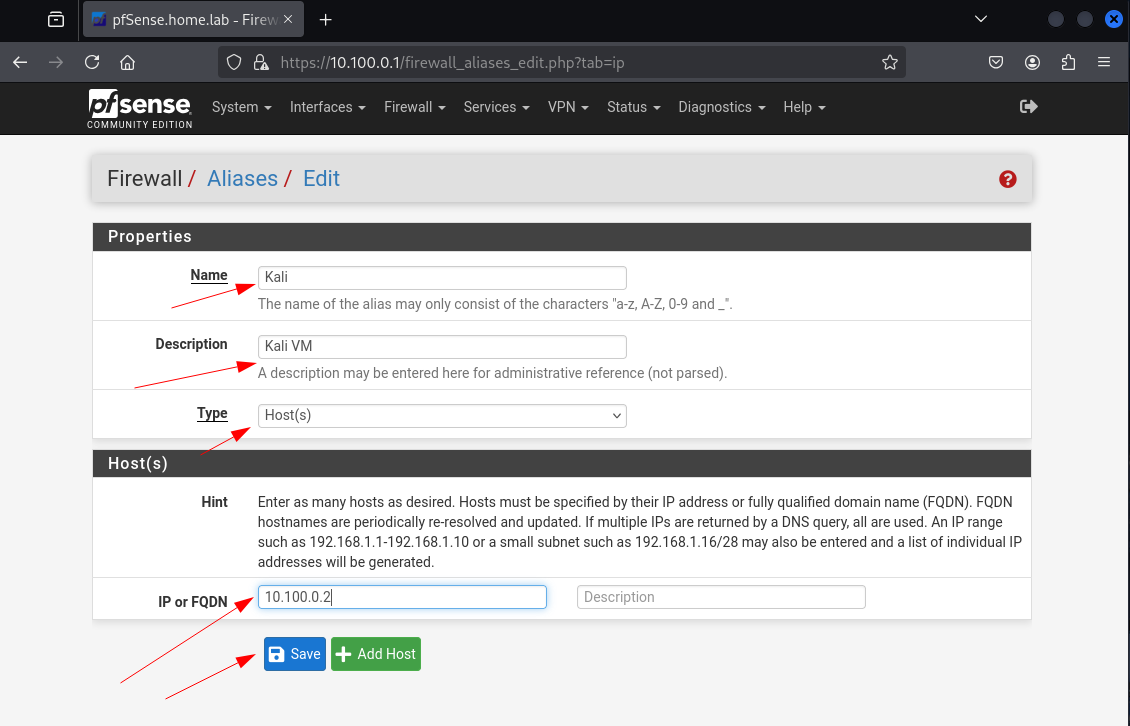
Input the fields and hit Save
Create Firewall Rules
Next, we'll set up firewall rules to control traffic between network zones:
- LAN: Block access to the host OS and WAN.
- DMZ: Allow DNS and Kali access; block everything else.
- AD: Allow internet, Kali, and gateway access; block other private IPs.
LAN
This subnet will host our attack/management Kali VM, the SOC VM (Wazuh & Suricata) and the VOC VM (GVM & EASM tools)
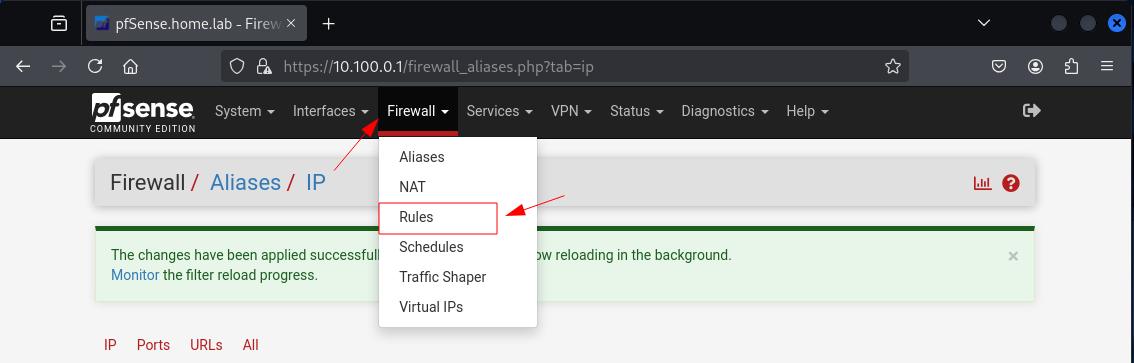
Navigate to Firewall > Rules
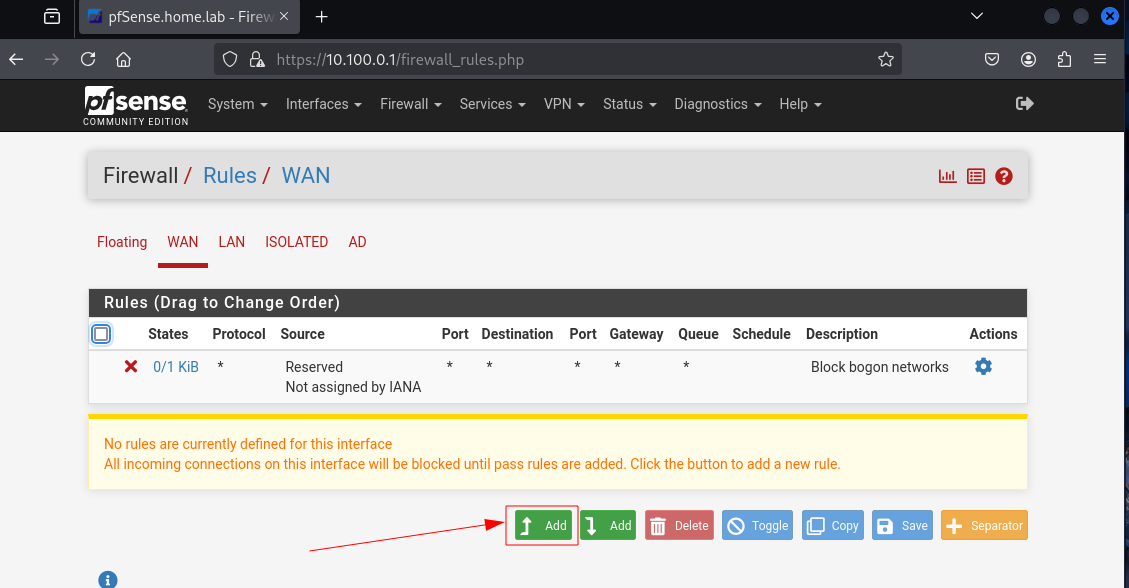
Click on Add
Follow the following specifics :
- Action: Block
- Interface: LAN
- Address Family: IPv4 + IPv6
- Protocol: Any
- Source: Any
- Destination: WAN subnets
- Description: Block access to any on same network as host OS
Then click Save
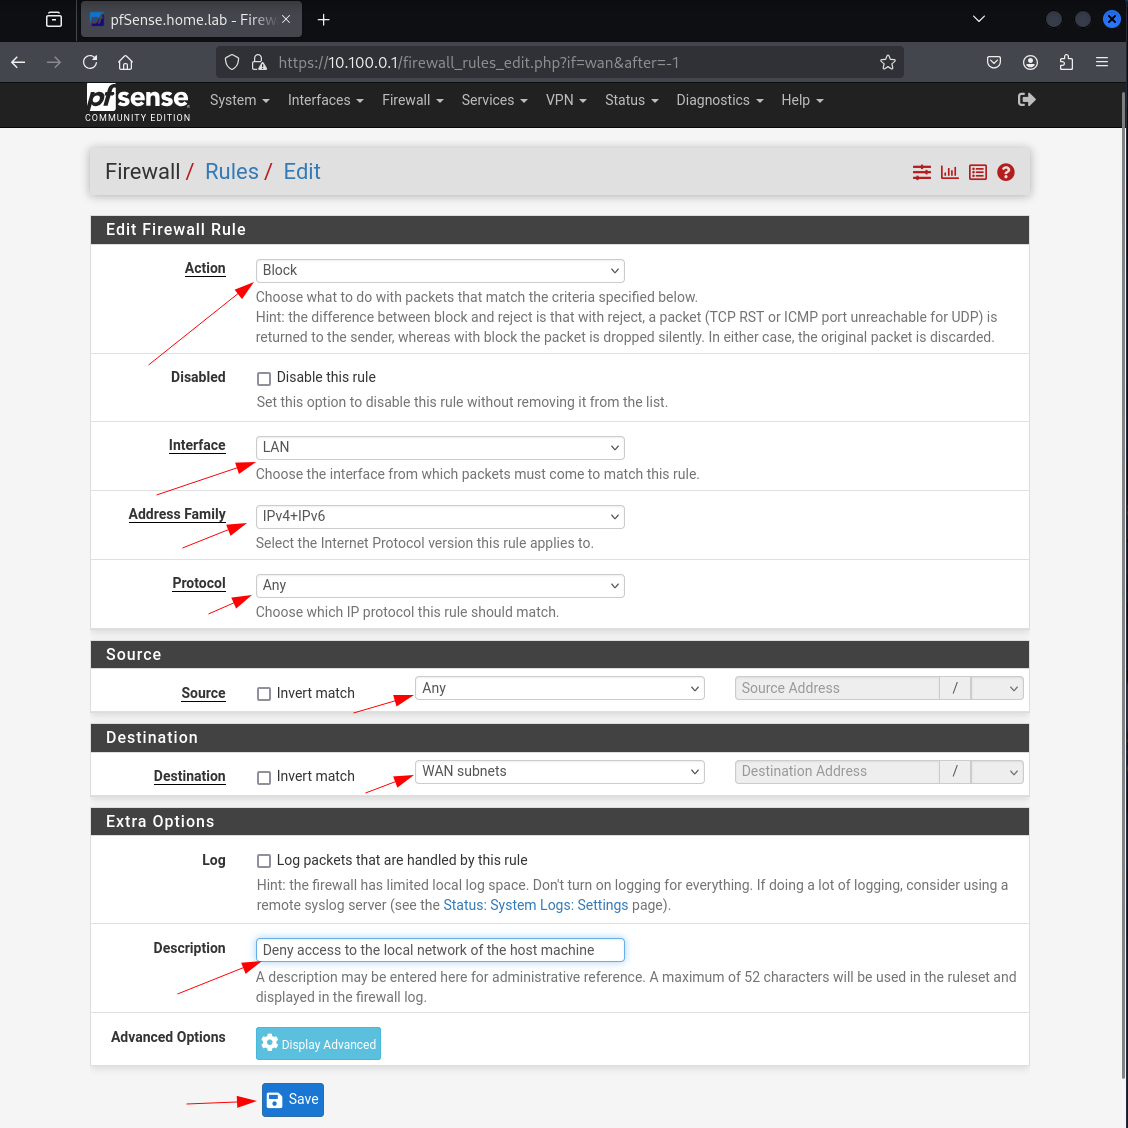
image caption
While the "Block bogon networks" rule is not typically required on LAN interfaces, it can be enabled if desired. Navigate to Interfaces > LAN, scroll to the bottom of the page, and select the checkbox labeled Block bogon networks. After clicking Save and Apply Changes, the rule will be added to the firewall rules table automatically.
LAN desired rules
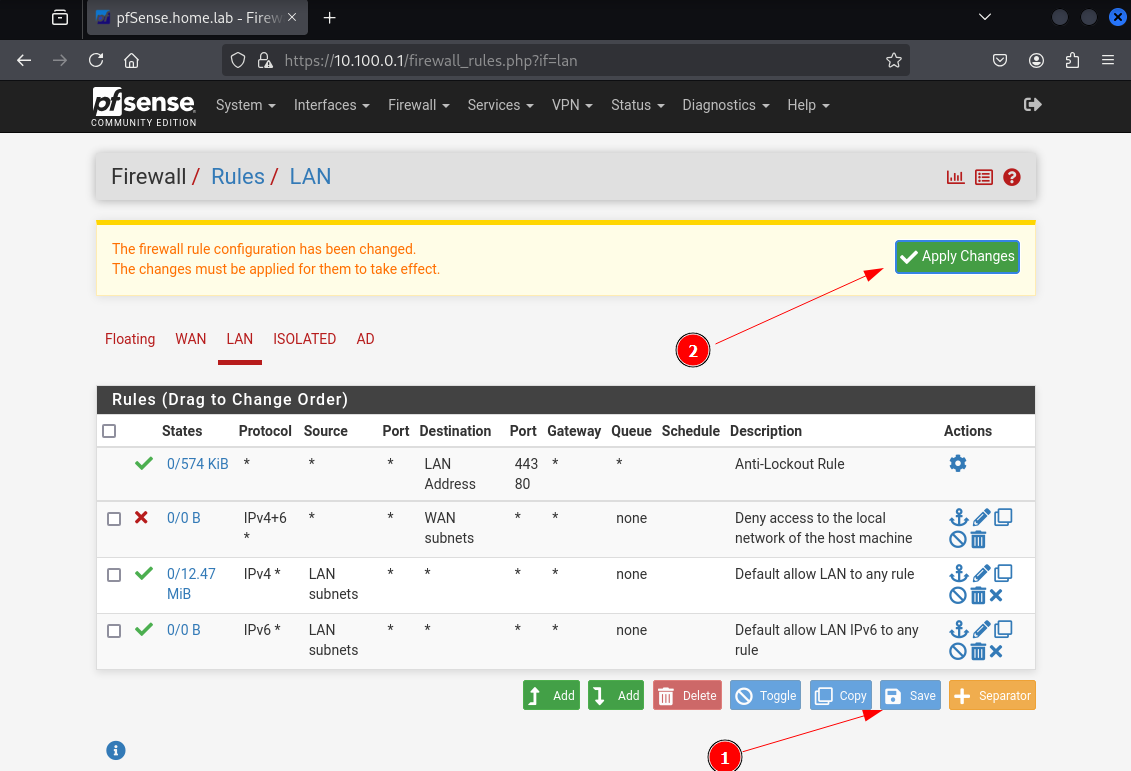
Click on Save then on Apply Changes
DMZ
This subnet will host external facing applications and meant to be isolated from the internal subnets
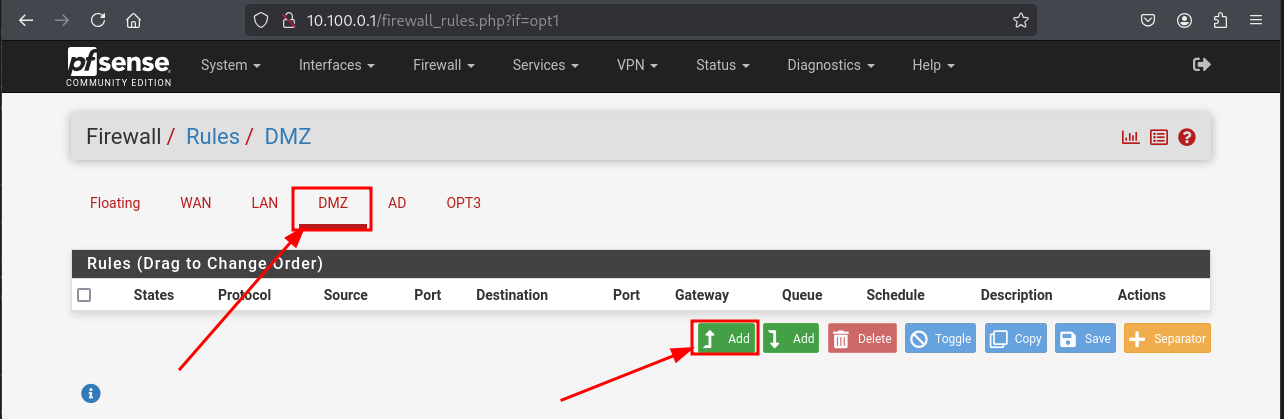
image caption
Follow the following specifics :
Add a Rule
- Action: Pass
- Interface: DMZ
- Address Family: IPv4
- Protocol: UDP
- Source: DMZ subnets
- Destination: DMZ address
- Destination Port Range:
- From: DNS (53)
- To: DNS (53)
- Description: Allow DNS lookups to the default gateway
Then click Save
Add a Rule
- Action: Pass
- Interface: DMZ
- Address Family: IPv4
- Protocol: Any
- Source: DMZ subnets
- Destination: Address or alias =
Kali - Description: Allow packets to Kali VM
Then click Save
Add a Rule
- Action: Block
- Interface: DMZ
- Address Family: IPv4 + IPv6
- Protocol: Any
- Source: Any
- Destination: Any
- Description: Block access to everything
Then click Save
Internet access in the DMZ is enabled in a controlled manner. Firewall rules will be added progressively, based on the specific network and port requirements of each vulnerable application deployed. This ensures minimal exposure while maintaining functionality for testing.
DMZ desired rules
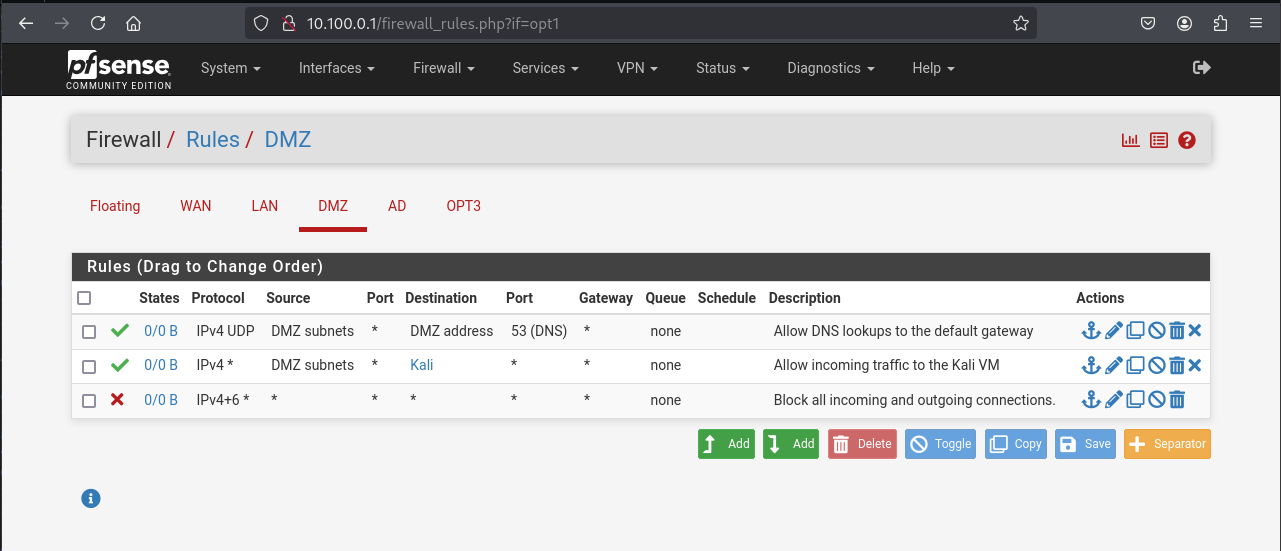
Click on Save then on Apply Changes
AD
This subnet hosts internal workstations and simulates an enterprise environment. It will be used to deploy GOAD (GameOfActiveDirectory), a vulnerable Active Directory lab designed for internal network testing and privilege escalation scenarios.
Add a Rule
- Action: Pass
- Interface: AD
- Address Family: IPv4
- Protocol: Any
- Source: AD subnets
- Destination: Address or Alias = RFC1918 (Make sure you check ✅ invert match)
- Description: Allow packets to any non-private address
Then click Save
AD subnetThis rule is designed to block traffic to all private IPv4 address ranges. As demonstrated in the following section, an exception will be created above this rule to permit access to the Kali machine, aliased as 10.100.0.2.
Going forward, if access to other private IP addresses is required by your AD hosts, ensure that the corresponding allow rules are placed above this blocking rule, in accordance with the top-to-bottom rule evaluation order.
Add a Rule
- Action: Pass
- Interface: AD
- Address Family: IPv4
- Protocol Any
- Source: AD subnets
- Destination: Address or Alias = Kali
- Description: Allow packets to Kali VM
Then click Save
Add a Rule
- Action: Pass
- Interface: AD
- Address Family: IPv4
- Protocol: Any
- Source: AD subnets
- Destination: AD address
- Description: Allow packets to default gateway
Then click Save
Add a Rule
- Action: Block
- Interface: AD
- Address Family: IPv4 + IPv6
- Protocol: Any
- Source: Any
- Destination: Any
- Description: Block everything else
Then click Save
AD desired rules
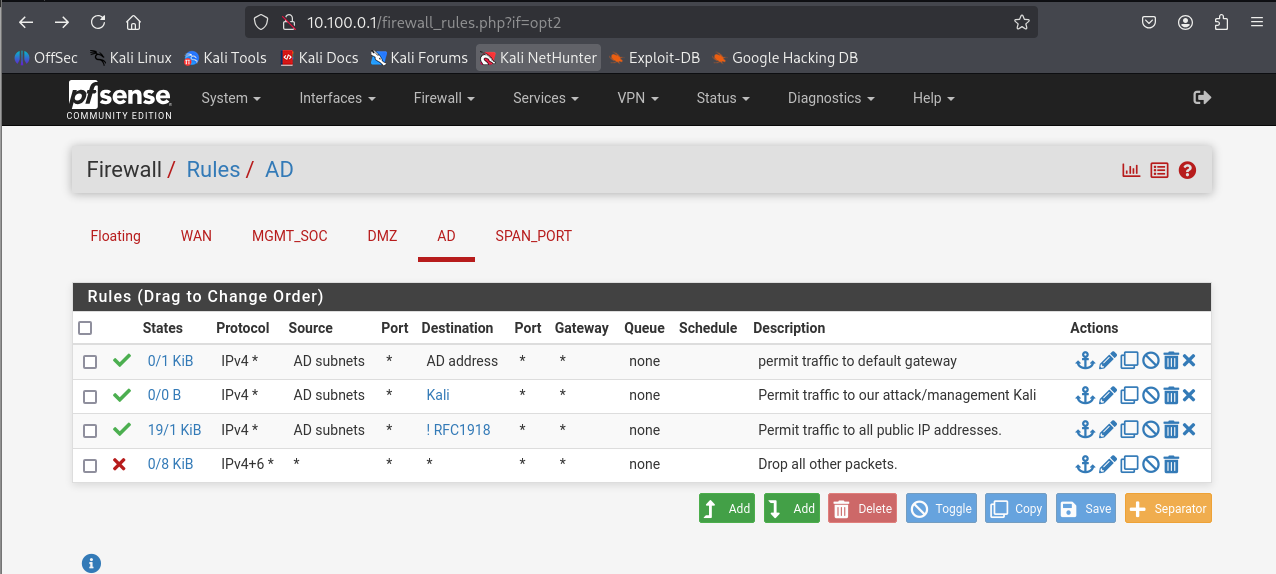
Click on Save then on Apply Changes
Firewall rule evaluation is sequential—from top to bottom. Ensure that the rule allowing traffic to Kali is positioned above the RFC1918 block rule. If it is placed below, the traffic will be blocked before reaching its destination.
Additionally, when Kali resides on the same subnet as the AD hosts, firewall rules become irrelevant, as intra-subnet traffic is switched locally and does not pass through the firewall.
Floating rules
Floating rules provide the flexibility to apply a firewall rule to one or several interfaces simultaneously. Although rules are typically managed on a per-interface basis for clarity, certain use cases benefit from floating rules to avoid duplicating the same rule across multiple interfaces.
Add the port alias
Block logins to the firewall
To enhance security, this rule prevents devices in certain subnets from accessing the firewall’s web interface or other administrative services (e.g., SSH). It ensures that only trusted interfaces can reach the firewall's management ports, reducing the attack surface and protecting against unauthorized access attempts. We will use a an alias for ports 22 (ssh), 80 (http) and 443 (https) and a floating rule for that.
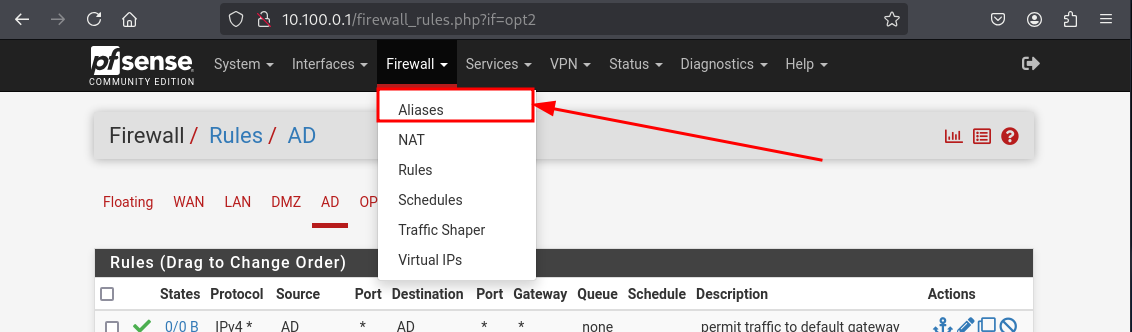
Navigate to Firewall > Aliases

Choose Ports and hit Add
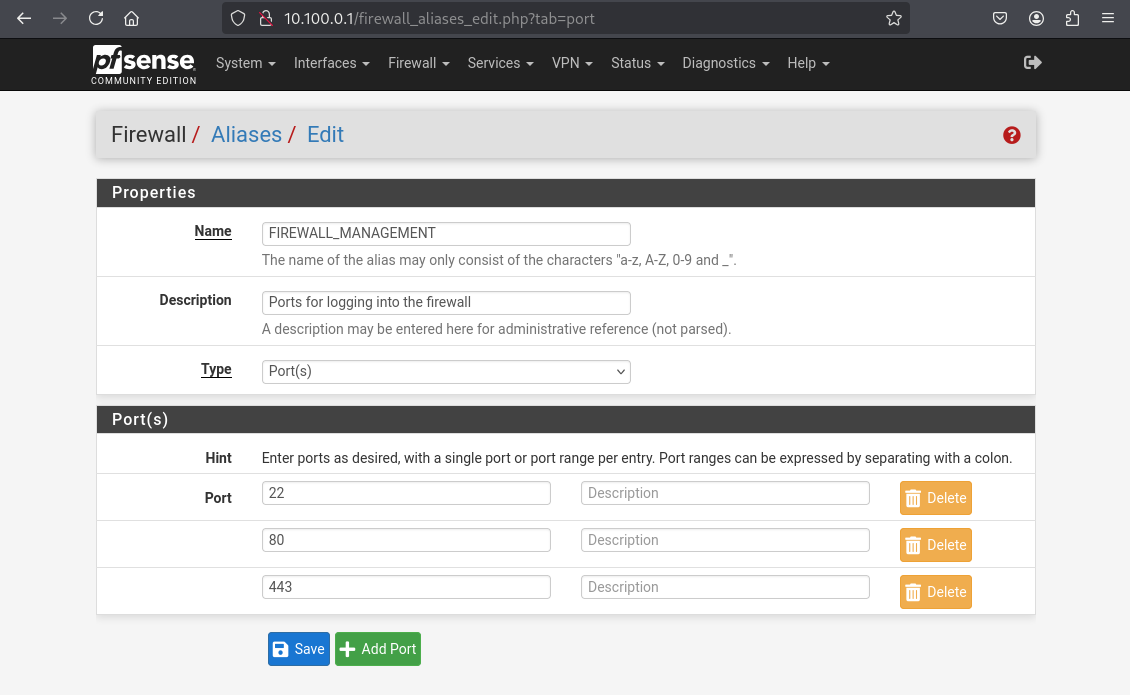
Input the data and hit Save
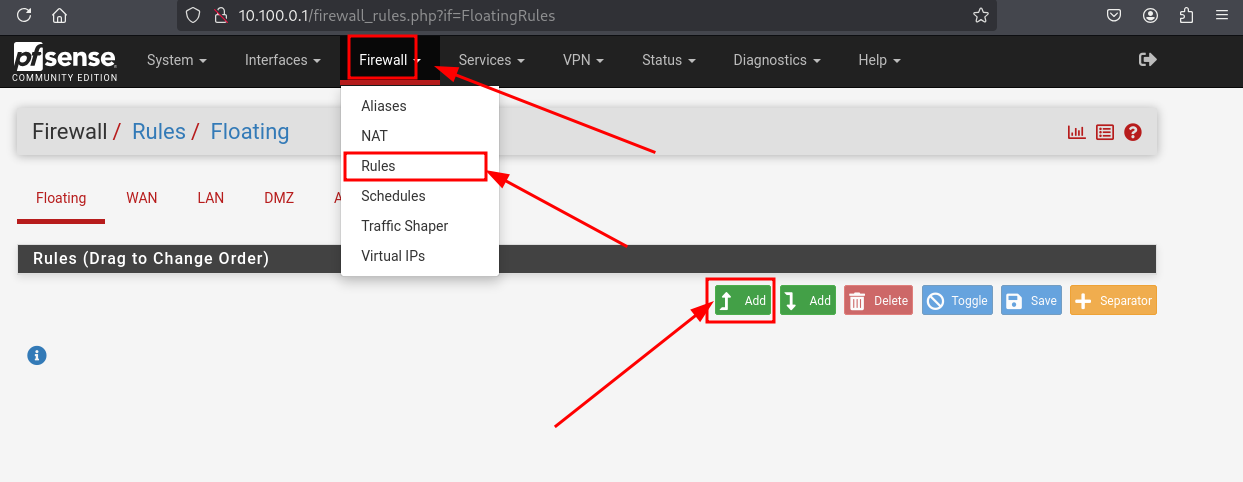
Navigate to Firewall > Rules and hit Add
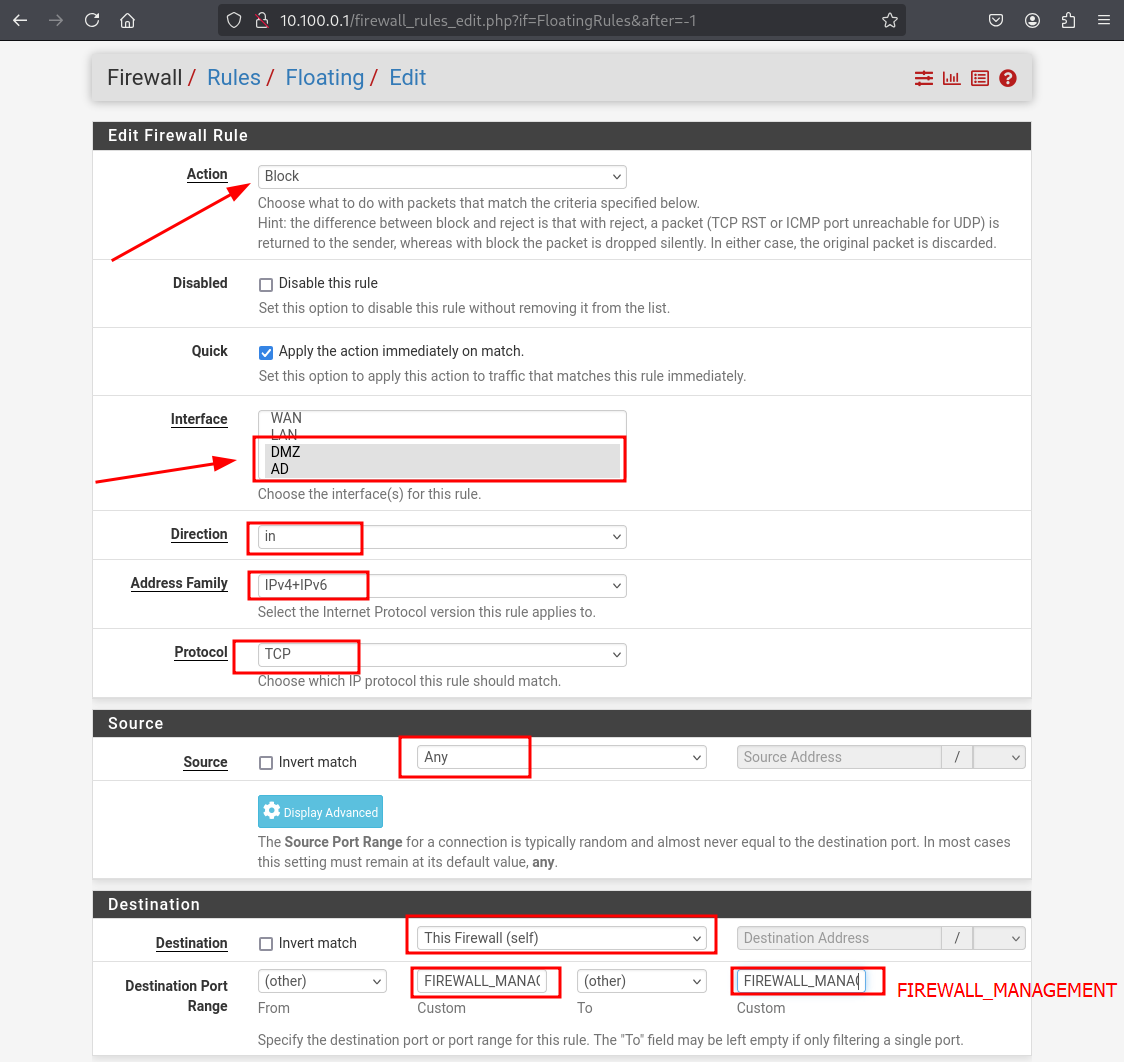
Fill in the indicated fields, then hit Save
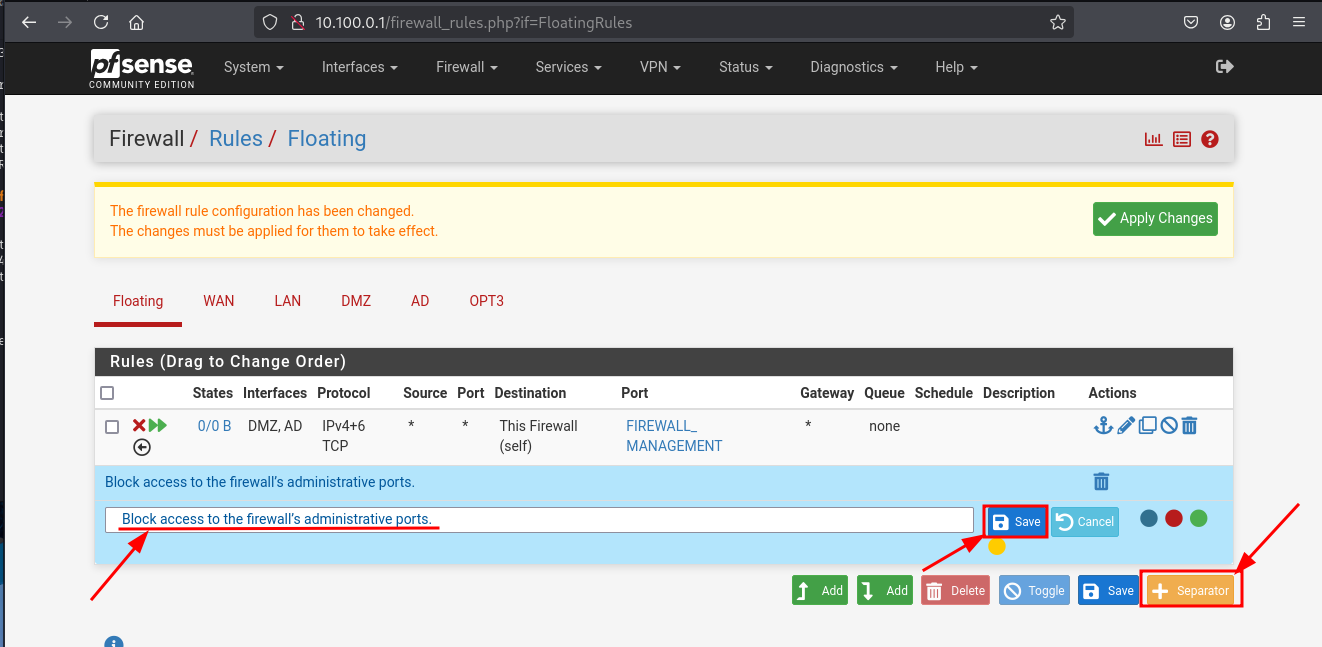
Create two seperators with the appropriate name
As you continue building out the VirtualBox lab, you will likely add additional interfaces that should not allow access to the firewall's management interface. In such cases, return to this configuration, modify the existing rule, and add the new interface to the restriction list.
These rules were implemented to support subnets that require internet access but are restricted from accessing private IP spaces. For internet connectivity, these subnets must communicate with the firewall's gateway address. However, access to administrative login ports on the firewall should remain blocked.
Retrieve Kali’s updated DHCP lease entry.
Authenticate into the Kali virtual machine, open a terminal session, and enter the command as illustrated below.
sudo ip link set eth0 down && sudo ip link set eth0 up
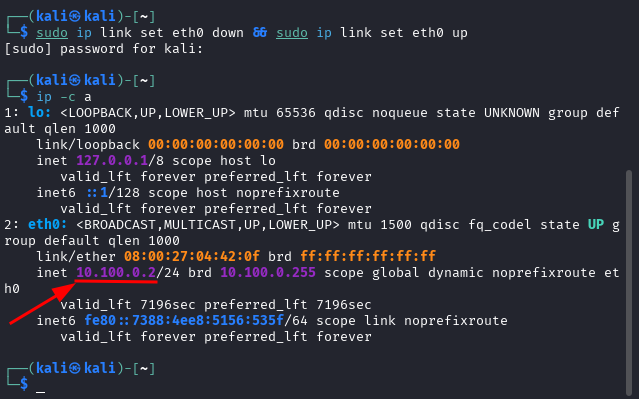
Your IP address should now be 10.100.0.2 as configured.
pfSense is now fully configured with proper segmentation and firewall rules. Your lab environment is ready to deploy employee workstations and install security tools for hands-on testing and analysis. Proceed to the next section if you want to deploy the full lab or add one of the environnements described here.
Congratulations !
pfSense is now fully configured with proper segmentation and firewall rules. Your lab environment is ready to deploy employee workstations and install security tools for hands-on testing and analysis.
Proceed to the next section if you want to deploy the full lab or add one of the environnements described here.